
A table saw push stick is a vital safety tool used to guide workpieces through power tools like table saws, ensuring hands remain away from blades. Its simple design, often crafted from wood, provides control and protection, making it an essential accessory for woodworking projects. The push stick template PDF offers a convenient guide for creating custom push sticks tailored to specific needs, enhancing both safety and efficiency in the workshop.
1.1 What is a Push Stick?
A push stick is a safety tool used in woodworking to guide materials through power tools like table saws, jointers, or router tables. It keeps hands away from cutting blades, reducing accident risks. Typically made from wood, it provides firm control over workpieces, ensuring smooth, precise cuts. Push sticks can be custom-made using templates, such as the table saw push stick template PDF, which offers a design guide for creating these essential workshop accessories.
1.2 Importance of Safety in Table Saw Operations
Table saw operations involve high-speed blades, making safety paramount to prevent severe injuries. A push stick is crucial as it keeps hands away from the cutting zone, reducing accident risks. Proper control and protection ensure smoother cuts and safer woodworking experiences. Neglecting safety precautions can lead to serious harm, emphasizing the necessity of tools like push sticks in maintaining a secure working environment for all woodworking tasks.
1.3 Purpose of a Push Stick Template
A push stick template serves as a guide for crafting consistent and effective push sticks. It ensures precise measurements and shapes, making the tool Both safe and functional. The template helps woodworkers create push sticks that suit their specific needs, providing a reliable way to maintain control over workpieces during table saw operations. This tool enhances workshop efficiency while prioritizing safety through standardized designs.
Benefits of Using a Push Stick
Using a push stick enhances safety by keeping hands away from blades, improves control over workpieces, and reduces the risk of accidents, ensuring smoother cuts and better results.
2.1 Enhanced Safety While Operating Power Tools
Using a push stick significantly enhances safety by maintaining a safe distance between hands and cutting blades. It acts as a physical barrier, reducing the risk of accidental injuries. The push stick ensures consistent control over workpieces, preventing slips and kickbacks. This tool is particularly crucial for table saws, where the blade’s proximity to the operator demands utmost caution. By utilizing a push stick, woodworkers can focus on precise cuts while minimizing potential hazards, ensuring a safer working environment.
2.2 Improved Control Over Workpieces
A push stick provides enhanced control over workpieces, ensuring precise alignment and steady movement through the table saw. Its design, often featuring notches or contours, allows for consistent pressure application, preventing slips and kickbacks. This improved control enables smoother cuts and reduces the risk of uneven edges. By maintaining firm guidance, the push stick helps woodworkers achieve professional-grade results with greater accuracy and confidence, making it an indispensable tool for precise woodworking operations.
2.3 Reduction of Accidents and Injuries
Using a push stick significantly reduces the risk of accidents and injuries by maintaining a safe distance between the operator’s hands and the table saw blade. Its sturdy design prevents accidental contact, minimizing the potential for severe cuts or injuries. This essential safety tool is particularly crucial when handling narrow or uneven workpieces, providing an additional layer of protection and peace of mind during woodworking operations, thereby safeguarding the well-being of the user.
Materials and Tools Required
- Materials: Plywood, scrap wood, or durable wood types for the push stick body and handle.
- Tools: Bandsaw or jigsaw for cutting, drill press for precise holes, and sandpaper for smoothing edges.
- Additional: Glue, clamps, and safety gear like gloves and goggles for safe crafting.
3.1 Recommended Wood Types for Push Sticks
- Durable hardwoods: Maple, cherry, or walnut are ideal for push sticks due to their strength and resistance to wear.
- Softwoods: Straight-grained pine or fir can also work well if properly seasoned and free of knots.
- Plywood: A sturdy plywood, such as birch or maple, is a great option for its stability and resistance to warping.
- Scrap wood: Use high-quality, knot-free scrap wood to ensure reliability and safety.
- Thickness: Opt for wood that is 1/2″ to 3/4″ thick for optimal control and durability.
Avoid wood with knots or imperfections, as they can weaken the push stick and compromise safety.
3.2 Essential Tools for Crafting a Push Stick
To craft a push stick, you’ll need a table saw or band saw for cutting, a sander for smoothing edges, and a drill press for adding holes or handles. Use clamps to secure the template and wood during cutting. Sandpaper and a file ensure a polished finish. Safety glasses and a dust mask are crucial for protection. A pencil and marker help in marking cuts, while adhesive secures the template to the wood for precise cuts.
Step-by-Step Guide to Making a Push Stick
Start by planning your design using a template. Cut the wood according to the template, sand the edges, and assemble the pieces. Ensure a smooth finish for safe and efficient use.
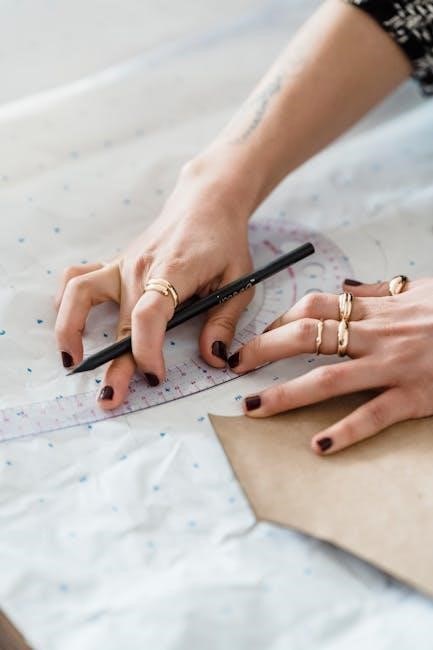
4.1 Planning the Design Using a Template
Begin by selecting a suitable push stick template, which can be downloaded as a PDF. These templates offer precise measurements and shapes, ensuring your push stick is functional and safe. Review the design, considering the size and material thickness. Adjust the template if needed to fit your specific table saw setup. Proper planning ensures a well-fitting and effective tool, enhancing both safety and control during woodworking operations.
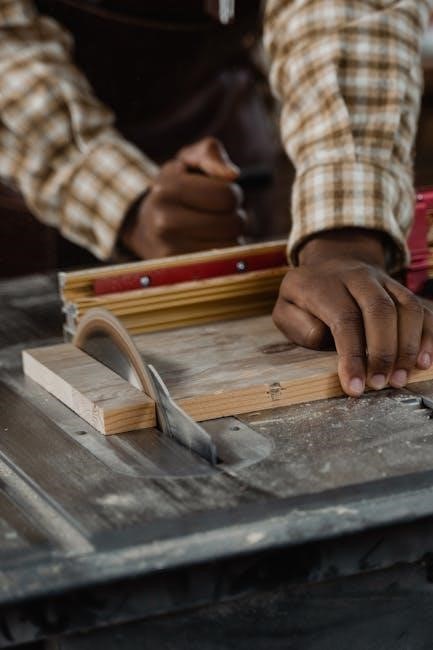
4.2 Cutting Out the Push Stick
Use a band saw or jigsaw to carefully cut out the push stick following the template’s guidelines. Ensure the material, such as plywood or scrap wood, is securely attached to the template using adhesive. Cut slowly and precisely to maintain accuracy. Sand the edges for a smooth finish. Properly cut push sticks ensure safe and effective use with your table saw, providing better control over workpieces during cutting operations.
4.3 Assembly and Finishing Touches
After cutting, sand all edges for smoothness and apply a finish like oil or wax for durability. Attach any additional features, such as handles or non-slip grips, using wood glue or screws. Ensure all components are securely fastened. Finally, inspect the push stick for any imperfections or sharp edges. Proper assembly and finishing ensure the push stick is both functional and safe to use, providing reliable performance during table saw operations.

Tips for Using a Push Stick Effectively
Always maintain firm control and keep the push stick close to the workpiece. Ensure hands stay clear of the blade and guide the stock smoothly through cuts.
5.1 Proper Handling Techniques
Proper handling techniques involve gripping the push stick firmly but comfortably, ensuring consistent pressure. Keep your hands away from the blade’s path and maintain control throughout the cut. Always position the stick to guide the workpiece steadily, preventing any sudden movements. This method ensures safety and precision, minimizing the risk of accidents while operating power tools like table saws.
5.2 Maintaining Control During Cuts
Maintaining control during cuts is crucial for safe and accurate results. Use the push stick to apply steady, consistent pressure, keeping the workpiece flat against the table. Ensure the stick remains aligned with the fence to prevent binding. Avoid applying excessive side pressure, as this can lead to kickback or uneven cuts. Proper control ensures smooth operation and protects against accidents, making the push stick an indispensable tool for precise woodworking tasks.
5.3 Storage and Accessibility
Proper storage ensures your push stick is always ready for use. Keep it near the table saw, such as on a hook or in a designated slot. Accessibility is key to encouraging frequent use. Store it in a dry place to prevent warping or damage. Consider having multiple push sticks for different tasks, each stored in easy-to-reach locations. This ensures safety and efficiency are never compromised during woodworking projects.
Common Mistakes to Avoid
Using improper materials, ignoring safety guidelines, and poor design choices are common mistakes that can compromise safety and effectiveness when using a push stick.
6.1 Improper Use of Materials
Using materials with knots, warps, or irregularities can lead to a push stick that lacks the necessary rigidity and control. Flexible or overly soft woods may bend under pressure, reducing effectiveness. Always opt for straight-grain, durable materials to ensure reliability and safety. Avoiding improper materials is crucial for maintaining consistent control and preventing accidents during table saw operations.
6.2 Ignoring Safety Guidelines
Ignoring safety guidelines when using a table saw push stick can lead to dangerous situations, such as loss of control or accidents. Always ensure the push stick is used correctly, keeping hands away from the blade. Neglecting proper techniques or ignoring material quality can result in unsafe outcomes. Adhering to established safety practices is crucial to prevent injuries and maintain workshop safety while operating power tools like table saws.
6.3 Poor Design Choices
Poorly designed push sticks can compromise safety and effectiveness. Using materials with knots or irregular shapes may lead to slippage or loss of control. A design that doesn’t fit the workpiece or table saw can increase the risk of accidents. Ensuring the push stick is well-suited to the task, with a stable grip and proper alignment, is essential for safe and efficient woodworking operations, as highlighted in many push stick template PDF guides available online.

Safety Guidelines for Table Saw Operations
Always keep hands away from the blade, use proper pushing techniques, and ensure the workpiece is firmly held against the fence to maintain control and prevent accidents.
7.1 General Workshop Safety Practices
Ensure proper ventilation, wear protective gear like safety glasses and gloves, and maintain a clean workspace to prevent accidents. Keep loose clothing tied back and avoid jewelry near machinery. Always use the correct tool for the task and follow manufacturer guidelines. Regularly inspect tools and equipment for damage. Stay alert and focused, avoiding distractions while operating power tools. Properly store tools and materials when not in use. These practices create a safer environment for using push sticks and other accessories effectively.
7.2 Specific Precautions for Table Saw Use
Always use a push stick or other safety devices to keep hands away from the blade. Never reach over the saw blade to retrieve cutoffs, and ensure the workpiece remains flat against the table and fence. Avoid wearing loose clothing or jewelry that could get caught. Keep the blade guard in place unless absolutely necessary for a specific cut. Maintain a firm grip on the workpiece and use proper body positioning to avoid loss of control during cuts.
7.3 Emergency Procedures
In case of a kickback or blade contact, immediately turn off the table saw and release the emergency stop. Do not attempt to remove any material stuck in the blade while it is moving. Keep a first aid kit nearby and seek medical attention if injuries occur. Regularly inspect the saw and push stick for damage to prevent accidents. Always stay calm and follow proper shutdown procedures to ensure safety in emergency situations.
Popular Push Stick Designs
Popular push stick designs include simple L-shaped models, contoured grip styles for better control, and adjustable versions for versatility in various woodworking tasks and table saw operations.
8.1 Simple L-Shaped Push Sticks
A simple L-shaped push stick is a classic design, offering excellent control and safety for table saw operations. Made from durable materials like wood or plastic, it features a straight handle and a perpendicular foot. This design provides a firm grip on the workpiece, allowing precise guidance through the saw. Its straightforward construction makes it easy to create using a push stick template PDF, ensuring versatility and effectiveness for various woodworking tasks.
8.2 Contoured Grip Designs
Contoured grip push sticks offer enhanced ergonomics and comfort, reducing fatigue during extended use. Their curved or angled handles provide a secure grasp, ensuring better control over the workpiece. Made from durable materials like wood or composite plastics, these designs prioritize safety and precision; The use of a push stick template PDF simplifies the creation process, allowing woodworkers to craft custom grips that fit their hand preferences, improving overall safety and efficiency in the workshop.
8.3 Adjustable Push Sticks
Adjustable push sticks offer versatility by accommodating various workpiece sizes and thicknesses. Their modular design allows for customization, ensuring a precise fit for different projects. Using a push stick template PDF, woodworkers can craft these tools with movable components, such as sliding handles or interchangeable pads. This adaptability enhances safety and control, making adjustable push sticks ideal for workshops handling diverse woodworking tasks. They are a practical solution for maintaining efficiency across multiple applications.

Maintenance and Care of Push Sticks
Regularly clean and inspect push sticks for damage or wear. Store them in a dry, accessible location to ensure they remain in good condition for safe use.
9.1 Cleaning and Inspection
Regular cleaning and inspection are crucial for maintaining push stick functionality. Use a soft cloth to wipe away dust and debris, ensuring smooth operation. Visually inspect for cracks, dents, or wear that could compromise safety. Replace any damaged push sticks immediately to prevent accidents. Proper care ensures longevity and reliability, keeping your workspace safe and efficient for all woodworking tasks.
9.2 Repairing Damaged Push Sticks
Repairing a damaged push stick is straightforward. Assess the damage; minor cracks or dents can often be reinforced with wood glue and clamps. For major damage, replace the push stick entirely to ensure safety. Sand rough edges and test functionality before reuse. Always verify repairs against your template to maintain proper dimensions and effectiveness. A reliable push stick is essential for safe and precise table saw operations.
9.4 Storage Best Practices
Proper storage of push sticks ensures longevity and readiness. Keep them in a dry, clean area away from direct sunlight. Store near the table saw, such as on the fence or in a nearby container, for easy access. Avoid stacking heavy objects on top of push sticks to prevent warping. Regularly inspect stored sticks for damage or wear. Using a designated holder or compartment keeps them organized and protects them from accidental damage or loss.
Troubleshooting Common Issues
Common problems include slipping, warping, or difficulty guiding thin workpieces. Regular inspection and maintenance can prevent these issues. Adjusting the push stick design may also resolve problems.
10.1 Slipping or Loss of Control
Slipping or loss of control often occurs due to poor material quality or improper design. Using high-quality wood and ensuring a smooth surface finish can prevent this. Additionally, applying a grip-enhancing material or adjusting the push stick’s template for better fit can improve stability. Regular inspection and maintenance are crucial to avoid such issues during table saw operations, ensuring consistent control and safety for the user.
10.2 Warping or Damage to the Push Stick
Warping or damage to a push stick can occur due to improper storage, exposure to moisture, or using low-quality materials. To prevent warping, ensure the wood is straight-grained and knot-free. Regularly inspect the push stick for signs of damage or wear. If damaged, replace or repair it promptly to maintain control and safety during table saw operations. A sturdy, well-maintained push stick is essential for reliable performance and workshop safety.
10.3 Difficulty in Guiding Thin Workpieces
Guiding thin workpieces with a push stick can be challenging due to lack of surface contact or improper design. Ensure the push stick has a contoured or notched edge for better grip. Using a push stick made from dense, straight-grained wood improves control. If issues persist, consider modifying the template to include a smaller, specialized design for thin materials, ensuring safer and more precise cuts during table saw operations.

Where to Find Push Stick Templates
Table saw push stick templates are widely available online as PDF downloads. Popular woodworking websites, forums, and communities offer free templates. Additionally, YouTube tutorials often provide template links, and woodworking stores may carry pre-made templates or kits. For custom designs, tutorials guide users through creating their own templates, ensuring a perfect fit for specific needs. Explore these resources to find or create the ideal push stick template.
11.1 Online Resources and PDF Downloads
Online resources offer a variety of push stick templates in PDF format, easily downloadable for immediate use. Websites like Woodsmith Magazine and Craftsmanspace.com provide free templates, while YouTube channels offer video guides and links to PDFs. These resources often include step-by-step instructions and customizable designs to suit different woodworking needs. Additionally, forums and woodworking communities share user-created templates, ensuring a wide range of options for crafting the perfect push stick. These downloads are convenient and accessible, catering to both beginners and experienced woodworkers.
11.2 DIY Template Creation
Creating a DIY push stick template allows for customization to suit specific woodworking needs. Design the template using graph paper or CAD software, ensuring it includes safety features like a curved edge for better control. Print the design on cardstock or plywood for durability. Use a bandsaw or jigsaw to cut it out, sanding edges for smoothness. Customize the size, shape, and handle style to enhance comfort and functionality, ensuring optimal performance and safety during table saw operations.
11.3 Recommended Websites and Forums
For reliable push stick templates, visit websites like Woodsmith Magazine and Fine Woodworking. Forums such as Reddit’s r/woodworking and The Wood Whisperer offer valuable discussions and resources. These platforms provide free PDF downloads, detailed plans, and expert advice, ensuring you find the perfect template to enhance your woodworking safety and efficiency with a custom push stick design.
A table saw push stick is a crucial safety tool, and using a template ensures precision and ease in its creation, always enhancing workshop efficiency and safety.
12.1 Recap of Key Points
A table saw push stick is a simple yet essential tool for maintaining safety and control during woodworking. Using a template ensures accuracy and ease in crafting a push stick, which keeps hands away from blades. It enhances precision, reduces accidents, and improves overall efficiency in various power tool operations, making it a vital accessory for every workshop.
12.2 Final Thoughts on Safety and Efficiency
A table saw push stick is indispensable for ensuring both safety and efficiency in woodworking. By keeping hands away from blades, it significantly reduces accident risks while providing precise control over workpieces. Using a template simplifies creation, allowing for consistent results. Prioritizing safety with a well-made push stick enhances overall workshop efficiency, making it a cornerstone of responsible and effective woodworking practices.
12.3 Encouragement to Start Your Project
Creating a table saw push stick is a simple yet impactful project that enhances workshop safety and efficiency. With a template, you can craft a custom design tailored to your needs. Start by gathering materials and tools, then follow the step-by-step guide to bring your push stick to life. This practical project not only improves your woodworking experience but also reinforces essential safety habits, making it a worthwhile endeavor for any DIY enthusiast.