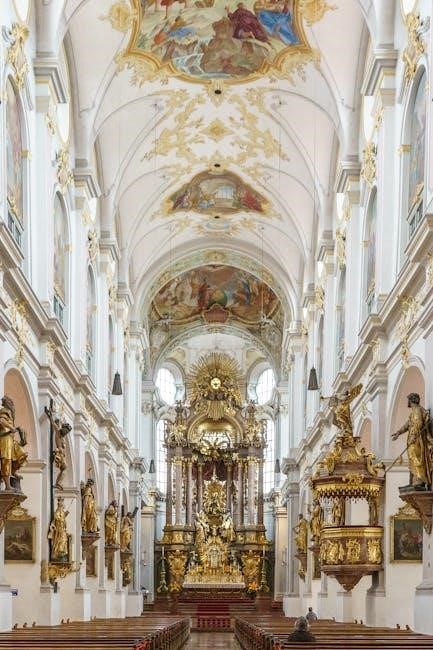
The 7 Swords of St. Michael Prayer is a powerful devotion invoking the Archangel’s protection and strength. Each sword symbolizes a virtue, guiding believers through life’s challenges. The prayer, often found in PDF formats, has become a popular tool for personal worship and group novenas, offering spiritual protection and inner peace.
Overview of the Prayer’s Significance
The 7 Swords of St. Michael Prayer holds profound significance as a spiritual tool for protection, faith, and inner strength. Rooted in Catholic tradition, it invokes Archangel Michael’s intercession, seeking divine aid against evil and adversity. The prayer is often recited for personal devotion, in novenas, or during times of spiritual struggle. Its structure, including seven swords symbolizing virtues like humility and fortitude, provides believers with a framework to overcome life’s challenges. The prayer’s accessibility in PDF formats has made it widely popular, allowing individuals to easily incorporate it into daily worship. This devotion not only strengthens faith but also fosters a deeper connection to St. Michael’s role as a protector and warrior in spiritual battles.
Historical Context of the 7 Swords
The 7 Swords of St. Michael Prayer traces its origins to ancient Catholic traditions, where St. Michael, as a warrior archangel, symbolizes divine protection. The prayer’s roots are intertwined with early devotional practices, often recorded in handwritten manuscripts. These manuscripts, carefully copied by devout followers, highlight the prayer’s enduring relevance. Over centuries, the prayer evolved, adapting to cultural and spiritual needs, while maintaining its core message of invoking St. Michael’s intercession. The modern era has facilitated its widespread distribution through PDF formats, ensuring accessibility for global devotion. This historical journey reflects the prayer’s adaptability and its deep connection to Catholic spirituality, making it a timeless tool for seeking protection and strength.

The Origin and Development of the Prayer
The 7 Swords of St. Michael Prayer originated from early Catholic devotional manuscripts, evolving over centuries. Its transition into PDF formats has enhanced accessibility for modern devotion.
Early Manuscripts and Handwritten Copies
The 7 Swords of St. Michael Prayer traces its roots to ancient Catholic devotional manuscripts, often meticulously copied by hand. These early texts, preserved with care, reflect the prayer’s enduring spiritual significance. Historians note that handwritten copies, some dating back to medieval times, were circulated among devout communities. The prayer’s structure and content were refined over centuries, maintaining its core themes of protection and virtue. The collaboration of Polish and Russian scholars has further illuminated its historical context. Today, these manuscripts serve as a bridge between the prayer’s past and its modern digital forms, such as the widely accessible PDF versions, ensuring its legacy endures for future generations.
Evolution of the Prayer in Digital Age
The 7 Swords of St. Michael Prayer has seamlessly transitioned into the digital era, with its widespread availability in PDF formats enhancing accessibility. The internet and social media have played a pivotal role in disseminating this devotion globally. Digital platforms now offer downloadable versions, enabling believers to easily incorporate the prayer into their daily routines. Apps and online resources further facilitate its recitation, making it a convenient tool for modern spirituality. This digital evolution has not only preserved the prayer’s traditional essence but also introduced it to new generations, ensuring its relevance in contemporary Catholic practice. The ease of sharing and accessing the prayer has fostered a renewed appreciation for its spiritual significance.

Theological and Symbolic Meaning of the 7 Swords
The 7 Swords symbolize cardinal virtues and spiritual protection, each representing a divine attribute. They embody humility, prudence, patience, justice, charity, temperance, and fortitude, offering believers strength against evil.
Representation of Virtues and Strength
The 7 Swords of St. Michael symbolize seven key virtues: humility, prudence, patience, justice, charity, temperance, and fortitude. Each sword embodies a divine attribute, empowering believers to overcome vice and evil. These virtues guide individuals in navigating life’s challenges with moral integrity and courage. The swords also represent strength, reflecting St. Michael’s role as a warrior archangel who battles evil forces. By invoking these virtues through prayer, devotees seek spiritual protection, inner peace, and the grace to live a life aligned with divine will. The symbolism underscores the prayer’s purpose of equipping believers with moral and spiritual armor to face daily struggles and maintain faith in God’s providence.
Connection to Archangel Michael’s Role
The 7 Swords of St. Michael Prayer deeply connects to Archangel Michael’s role as a divine protector and warrior. In Catholic tradition, St. Michael is often depicted wielding a sword, symbolizing his battle against evil forces. The seven swords represent his powerful intercession and protection, invoking his strength to combat spiritual and worldly challenges. The prayer aligns with Michael’s role as a defender of faith and righteousness, seeking his aid in overcoming evil influences. By reciting this prayer, believers call upon St. Michael’s warrior spirit to guide them in their own spiritual battles, reinforcing their faith and trust in his divine protection and intercession. This connection highlights his significance as a guardian of believers and a champion of God’s will.

Structure and Content of the Prayer
The 7 Swords of St. Michael Prayer is structured as a devotion to seek divine protection and strength. It includes invocations, reflections, and petitions, emphasizing faith and virtue.
Key Components and Themes
The 7 Swords of St. Michael Prayer is structured around seven distinct invocations, each corresponding to a sword symbolizing a specific virtue. These virtues—humility, prudence, patience, justice, charity, temperance, and fortitude—serve as spiritual weapons against evil. The prayer begins with an invocation of St. Michael, followed by reflections on each sword’s significance. It includes petitions for protection, strength, and guidance, emphasizing the Archangel’s role as a defender of faith. The prayer also incorporates meditations on overcoming vice and achieving inner peace. Its themes revolve around spiritual warfare, divine protection, and the pursuit of holiness, making it a powerful tool for personal devotion and communal worship; The PDF format often includes complementary prayers and reflections, enhancing its accessibility for believers seeking deeper spiritual connection.
Example of a Prayer from the PDF
One example from the PDF reads: “Glorious Sword of St. Michael, flash with a ray of the Holy Spirit, that we may see the face of our Heavenly Father and be worthy of the promises of our Lord Jesus Christ. Each sword represents a virtue—humility, prudence, patience, justice, charity, temperance, and fortitude—granting us strength to overcome evil. Protect us from spiritual battles and guide us toward holiness. May your victorious sign be our defense, and may we emerge triumphant in faith. Amen.” This prayer captures the essence of invoking St. Michael’s intercession for protection and spiritual growth, reflecting the core themes of the devotion.
Practical Uses of the 7 Swords Prayer
The 7 Swords Prayer is used for personal devotion, novenas, and group prayers, offering protection, strength, and spiritual guidance in daily life and spiritual battles.
Personal Devotion and Meditation
The 7 Swords of St. Michael Prayer is a profound tool for personal devotion and meditation, offering believers a structured way to seek protection and spiritual growth. Many recite it alone or as part of a seven-day novena, reflecting on its themes of strength and faith. The prayer’s focus on the seven virtues symbolized by the swords—such as humility, justice, and fortitude—guides individuals in their daily struggles and fosters inner peace. Its accessibility in PDF format allows for easy incorporation into personal worship, making it a popular choice for those seeking solace and divine intercession in their spiritual journeys.
Use in Novenas and Group Prayers
The 7 Swords of St. Michael Prayer is often incorporated into novenas, offering a structured seven-day devotion to seek protection, strength, and spiritual growth. Many Catholics recite this prayer collectively in groups, fostering a sense of community and shared intention. The prayer’s themes of justice, humility, and fortitude resonate deeply in group settings, amplifying its spiritual impact. Its availability in PDF format makes it easy to distribute and use during group worship, ensuring unity and coherence in prayer. This collective recitation not only strengthens faith but also provides comfort and solidarity among participants, making it a powerful tool for communal devotion and intercession.

The Role of Archangel Michael in Catholic Tradition
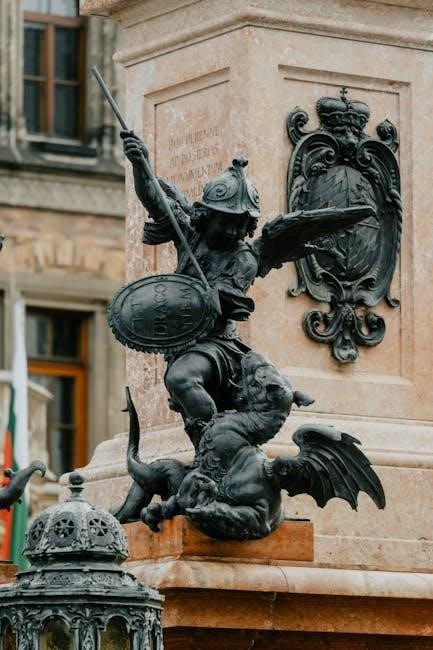
Archangel Michael is revered as a protector and warrior in Catholic tradition, often depicted with seven swords symbolizing justice and humility. He is invoked for protection against evil and spiritual battles. His role as a defender of the Church and humanity is central, emphasizing his strength and divine intercession. The prayer to the seven swords reflects this, seeking his aid in overcoming challenges and evil influences. Michael’s significance is deeply rooted in Catholic devotion, making him a powerful figure in prayers and novenas for protection, strength, and spiritual growth.
Michael as a Protector and Warrior
Archangel Michael is prominently depicted as a protector and warrior in Catholic tradition, often shown with a sword defeating evil. His role as a defender of faith and humanity is central, as he leads the armies of heaven against darkness. The seven swords symbolize his divine authority and the virtues of justice, humility, and strength. In prayers like the 7 Swords of St. Michael, believers invoke his protection against evil influences and spiritual battles. His warrior spirit embodies courage and divine intercession, making him a powerful figure in Catholic devotion and a steadfast guardian for those seeking refuge from adversity and sin.
His Significance in Spiritual Battles
Archangel Michael holds a paramount role in spiritual battles, often depicted as a warrior leading the fight against evil. His swords symbolize divine justice, strength, and the triumph of good over evil. In the 7 Swords of St. Michael Prayer, believers invoke his intercession for protection against spiritual darkness and malicious forces. This prayer emphasizes Michael’s role as a defender of faith, offering solace and courage to those engaged in spiritual warfare. By reciting this devotion, the faithful seek to align themselves with his virtues, such as justice and fortitude, to overcome adversity and remain steadfast in their commitment to God.
Patron Saints Associated with the 7 Swords
St. Gabriel Possenti and St. Gemma Galgani are key patron saints connected to the 7 Swords of St. Michael. Their lives exemplify the virtues the swords symbolize, such as courage and devotion, inspiring believers to seek their intercession for spiritual strength and protection.
St. Gabriel Possenti and His Connection
St. Gabriel Possenti, a Passionist saint, is deeply connected to the 7 Swords of St. Michael Prayer due to his unwavering faith and courage. His life reflected the virtues the swords symbolize, such as faith, courage, and devotion to God. As a patron saint of youth and students, he embodies the spiritual strength needed to overcome life’s challenges. Devotees often invoke his intercession alongside Archangel Michael for protection against evil and guidance in spiritual battles. His connection to the prayer highlights the importance of living a life rooted in faith and virtue, aligning with the prayer’s purpose of seeking divine protection and inner peace.
Other Patron Saints and Their Roles
Besides St. Gabriel Possenti, other patron saints are associated with the 7 Swords of St. Michael Prayer, each embodying unique virtues. St. Gemma Galgani, known as the “Saint of the Passion,” is often invoked for her deep connection to spiritual suffering and resilience. St. Joseph, as a protector of the Holy Family, symbolizes strength and guardianship, aligning with the prayer’s themes of protection. The Blessed Virgin Mary, though not directly a patron saint, is often included in devotionals for her intercession and maternal care. These saints, alongside St. Michael, inspire believers to embrace faith, courage, and virtue in their spiritual journeys, reinforcing the prayer’s purpose of seeking divine protection and guidance in overcoming life’s challenges.
Historical and Cultural Significance
The 7 Swords Prayer traces its roots to medieval practices, evolving into digital formats like PDF, reflecting enduring cultural significance in modern worship and devotion.
Depictions in Art and Literature
In art, St. Michael is often depicted wielding seven swords, symbolizing his victorious battles against evil. Icons like the one by Karp Zolotaryov feature him with these swords, emphasizing his role as a protector. In literature, the 7 Swords Prayer is highlighted in works like PRAYER OF THE SEVEN SWORDS OF ST MICHAEL THE ARCHANGEL by FR BENEDICT ALFRED, which explores the prayer’s significance. The PDF format has made these depictions and writings widely accessible, ensuring the prayer’s cultural and artistic legacy endures, inspiring devotion and artistic expression across centuries.
Cultural Impact and Popular Devotion
The 7 Swords of St. Michael Prayer has deeply influenced Catholic culture, becoming a cherished devotion for many; Its widespread popularity stems from its accessibility in PDF formats, allowing easy sharing and personal reflection. Many Catholics incorporate this prayer into their daily lives, seeking protection and strength. The prayer’s cultural impact is evident in its use during novenas, group prayers, and individual meditation. It has inspired numerous devotional books and digital resources, further amplifying its reach. The prayer’s ability to connect believers with St. Michael’s protective role has made it a cornerstone of modern spirituality, fostering a sense of hope and resilience among the faithful worldwide.
Benefits of Reciting the 7 Swords Prayer
Reciting the prayer offers protection against evil, fosters spiritual growth, and brings inner peace, helping believers navigate life’s challenges with faith and resilience.
Protection Against Evil Influences
The 7 Swords of St. Michael Prayer serves as a powerful shield against evil influences, offering divine protection to those who recite it. Each sword symbolizes a virtue, such as fortitude and justice, which collectively strengthen the believer’s faith and resilience. The prayer is particularly effective in spiritual battles, helping individuals resist temptation and negative forces. By invoking Archangel Michael’s intercession, devotees seek refuge under his celestial protection, which is both physical and spiritual. This devotion is especially valued in times of turmoil, as it provides a sense of security and alignment with God’s divine will. The prayer’s ability to ward off evil makes it a cherished tool for those seeking safety and guidance in their faith journey.
Spiritual Growth and Inner Peace
The 7 Swords of St. Michael Prayer is a profound tool for fostering spiritual growth and attaining inner peace. By reciting this devotion, believers can deepen their connection with the divine and cultivate virtues such as humility, charity, and temperance. The prayer’s meditative structure encourages self-reflection and surrender to God’s will, helping individuals overcome internal struggles and achieve emotional balance. Its focus on Archangel Michael’s strength inspires believers to confront life’s challenges with courage and faith. Regular recitation of the prayer, especially in its PDF format, provides a sense of calm and clarity, making it a cherished practice for those seeking spiritual renewal and harmony in their lives.
Practical Tips for Incorporating the Prayer
Start with daily recitation, using the PDF as a guide. Reflect on each sword’s virtue during meditation, allowing its meaning to inspire your spiritual journey and actions.
Daily Recitation and Reflection
Daily recitation of the 7 Swords of St. Michael Prayer fosters spiritual growth and protection. Begin each day by reading the prayer from the PDF, focusing on its profound meaning. Reflect on each sword’s virtue—humility, prudence, patience, justice, charity, temperance, and fortitude—and how they apply to your life. Consider journaling your insights to deepen your connection with the prayer’s message. Recite it during morning meditation or before challenging situations to seek strength. Allow the words to guide you in embracing faith and overcoming adversity. This consistent practice nurtures inner peace and aligns your heart with divine will, while the PDF serves as a convenient and accessible guide for daily devotion.
Using the PDF for Personal Worship
The PDF of the 7 Swords of St. Michael Prayer offers a convenient and accessible format for personal worship. Print it to create a dedicated prayer corner or carry it digitally on your device for anytime access; The PDF’s clear layout allows for focused reading and reflection, enhancing your meditation experience. Use it to guide daily devotion, ensuring consistency in your spiritual practice. Many find comfort in highlighting or annotating the text, personalizing their worship. This portable resource empowers individuals to invoke Archangel Michael’s protection and virtues wherever they are, fostering a deeper connection to faith and inner peace. Its availability in digital format has made it a cherished tool for modern spirituality and personal growth.
Modern Interpretations and Renewed Interest
The 7 Swords of St. Michael Prayer has seen a resurgence in popularity, with its PDF format making it easily accessible for modern spiritual practices; Contemporaries appreciate its timeless relevance, integrating it into daily devotion and digital worship. This renewed interest highlights its adaptability to evolving spiritual needs, ensuring its legacy endures in the digital age.
Contemporary Relevance of the Prayer
The 7 Swords of St. Michael Prayer remains deeply relevant in modern spirituality, offering protection and strength against life’s challenges. Its themes of virtue and resilience resonate with contemporary believers seeking guidance. The prayer’s availability in PDF formats has made it easily accessible, allowing for personalized worship and group devotion. Many find solace in its timeless message, which addresses spiritual battles and the pursuit of inner peace. This devotion has become a cornerstone for those navigating today’s complexities, proving its enduring significance in fostering faith and courage. Its resurgence highlights its universal appeal, bridging traditional and modern practices seamlessly.
Impact on Modern Spirituality
The 7 Swords of St. Michael Prayer has profoundly influenced modern spirituality by providing a powerful tool for seeking divine protection and inner strength. Its widespread availability in PDF formats has enabled individuals to incorporate it into daily devotion, fostering a deeper connection to faith; Many find comfort in its timeless message, which addresses contemporary challenges such as stress, uncertainty, and spiritual warfare. The prayer’s emphasis on virtues like humility and fortitude resonates with those seeking moral guidance. Additionally, its use in group prayers and novenas has strengthened communal worship, creating a sense of unity among believers. This devotion continues to inspire modern spirituality, offering solace and empowerment in an increasingly complex world.
The 7 Swords of St. Michael Prayer remains a powerful and enduring devotion, offering protection, strength, and spiritual guidance. Its timeless relevance continues to inspire faith and peace.
Final Thoughts on the Prayer’s Importance
The 7 Swords of St. Michael Prayer holds profound significance as a spiritual tool for protection, strength, and inner peace. Rooted in Catholic tradition, it connects believers to Archangel Michael, a warrior and protector, emphasizing virtues like humility and fortitude. The prayer’s accessibility in PDF formats has made it a popular choice for personal devotion and group novenas, bridging ancient devotion with modern spirituality. Its enduring relevance lies in its ability to inspire faith and resilience, offering solace in times of challenge and fostering a deeper connection to divine grace.
Encouragement to Explore Further
Exploring the 7 Swords of St. Michael Prayer offers a transformative spiritual experience, deepening one’s connection to faith and divine protection. With its rich symbolism and accessible PDF resources, this prayer invites individuals to embrace its virtues and strength. Whether for personal devotion or communal worship, the prayer’s relevance in modern spirituality is undeniable. It provides solace, protection, and guidance, making it a timeless tool for navigating life’s challenges. Embrace this powerful devotion and discover its profound impact on your spiritual journey, fostering inner peace and resilience in the face of adversity;