The Sabre Motion Sensor Alarm is a reliable security solution designed to enhance home safety with advanced features for detection and alert systems, ensuring peace of mind.
1.1 Overview of Sabre Motion Sensor Alarm
The Sabre Motion Sensor Alarm is a user-friendly security device designed to detect movement and trigger alerts. Compact and easy to install, it offers reliable performance for home protection. Utilizing advanced PIR technology, it provides accurate motion detection with adjustable sensitivity. Battery-powered for convenience, it features long-lasting battery life and customizable alert settings. Ideal for indoor use, the alarm enhances safety by alerting users to potential intruders, ensuring peace of mind and added security for families and properties.
1.2 Importance of Motion Sensor Alarms for Home Security
Motion sensor alarms play a crucial role in modern home security systems, offering an additional layer of protection against intruders. They provide real-time alerts, enabling prompt responses to potential threats. By detecting unexpected movement, these devices help prevent break-ins and safeguard valuables. Their presence can also deter criminals, enhancing overall safety. With features like adjustable sensitivity and customizable alerts, motion sensor alarms are essential for creating a secure and vigilant home environment, ensuring the safety of families and belongings.

Installation Guide
Install the Sabre Motion Sensor Alarm by mounting it at 6-8 feet high, ensuring optimal detection coverage. Follow step-by-step instructions for proper setup and placement.
2.1 Step-by-Step Installation Instructions
Begin by unpacking and preparing the Sabre Motion Sensor Alarm. Mount the device at 6-8 feet high, ensuring it faces the desired area. Secure it using screws or adhesive. Insert batteries, following polarity guidelines. Set the sensitivity level based on your environment. Test the alarm by triggering the sensor to ensure proper function. Finally, review the manual for any additional settings or configurations to tailor the alarm to your security needs.
2.2 Mounting and Placement Recommendations
Mount the Sabre Motion Sensor Alarm at a height of 6 to 8 feet to maximize coverage and reduce false triggers. Place it in high-traffic areas like hallways or entryways. Ensure it faces the desired monitoring zone, avoiding direct sunlight or heat sources. Keep it away from windows to prevent external interference. Secure the device firmly to prevent tampering or accidental displacement. Proper placement ensures optimal performance and reliable security coverage for your home or office space.

Key Features of Sabre Motion Sensor Alarm
The Sabre Motion Sensor Alarm features adjustable sensitivity, long battery life, and reliable motion detection, ensuring effective security monitoring with minimal false alerts and easy maintenance.
3.1 Sensitivity Adjustment Options
The Sabre Motion Sensor Alarm offers adjustable sensitivity settings, allowing users to customize detection ranges to suit various environments. This feature minimizes false alarms caused by pets or drafts while maintaining reliable security coverage. By fine-tuning the sensor, homeowners can ensure accurate motion detection, enhancing overall system performance and reducing unnecessary alerts. This adaptability makes the alarm versatile for different spaces and specific security needs, providing peace of mind with tailored protection.
3;2 Battery Life and Power Management
The Sabre Motion Sensor Alarm is designed with efficient battery life, typically lasting up to 12 months on standard alkaline batteries. Advanced power management ensures minimal energy consumption while maintaining consistent performance. Users are alerted when battery levels are low, preventing unexpected downtime. This reliable battery life, combined with easy replacement options, ensures continuous security coverage without frequent maintenance, making it a practical choice for home protection and convenience.

How the Sabre Motion Sensor Alarm Works
The Sabre Motion Sensor Alarm uses advanced infrared technology to detect movement and trigger alerts, providing reliable security coverage and peace of mind for homeowners.
4.1 PIR (Passive Infrared) Technology Explained
PIR (Passive Infrared) technology detects motion by sensing heat emitted from moving objects within its field of view. The Sabre Motion Sensor Alarm uses this technology to identify intruders by monitoring infrared radiation changes. When movement is detected, it triggers an alert or alarm. PIR sensors are highly reliable and energy-efficient, making them ideal for home security systems. They operate by comparing the detected heat patterns to the surrounding environment, ensuring accurate detection while minimizing false alarms. This technology is widely used in motion-based security devices for its effectiveness and simplicity.
4.2 Motion Detection Range and Coverage Area
The Sabre Motion Sensor Alarm offers a detection range of up to 30 feet (9 meters) with a 120-degree coverage area. Its advanced PIR technology ensures wide-angle monitoring, ideal for large rooms or outdoor spaces. The sensor’s coverage is cone-shaped, detecting motion within its field of view. Environmental factors, such as temperature and obstructions, may affect range accuracy. Proper placement, as outlined in the installation guide, maximizes coverage and ensures reliable detection of intruders or movement in monitored areas.

Customization and Settings
The Sabre Motion Sensor Alarm allows users to customize settings, such as sensitivity levels, alarm duration, and volume, ensuring tailored security solutions for various environments and preferences.
5.1 Adjusting Sensitivity for Different Environments
Adjusting the sensitivity of the Sabre Motion Sensor Alarm ensures optimal performance in various settings. Lower sensitivity reduces false alarms in pet-friendly areas, while higher settings enhance security in high-risk zones. Users can fine-tune detection levels to accommodate environmental factors like lighting conditions or nearby objects. This feature allows for personalized security, ensuring the alarm responds accurately to legitimate threats without unnecessary activations, providing a balance between safety and convenience in diverse environments.
5.2 Configuring Alarm Duration and Volume
The Sabre Motion Sensor Alarm allows users to customize both the duration and volume of alerts. Duration can be set from a few seconds to several minutes, ensuring ample time to respond. Volume adjustment enables varying levels of audibility, catering to different hearing needs or environmental noise levels. These settings provide flexibility, allowing users to tailor the alarm’s response to their specific preferences, enhancing both convenience and effectiveness in various home security scenarios without compromising functionality.
Testing the Motion Sensor Alarm
Perform a walk-test to ensure the sensor detects motion accurately. Adjust sensitivity if needed to minimize false alarms and confirm the alarm triggers reliably during testing scenarios.
6.1 Walk-Test Procedure for Accuracy
Initiate the walk-test by activating the alarm’s test mode. Walk through the detection zone slowly, observing the LED indicators to ensure motion is detected accurately. Repeat the process from various angles and distances to verify consistent coverage. Adjust the sensor’s position or sensitivity if areas are missed or if false triggers occur. This step ensures optimal alarm performance and reliability in different scenarios and environments.
6.2 Troubleshooting Common Issues
If the alarm fails to trigger, check battery levels and connections. Ensure no obstructions block the sensor’s view. For false alarms, adjust sensitivity settings or reposition the device away from direct sunlight or pets. Restart the system after making adjustments. Refer to the manual for specific error codes and solutions. Regular maintenance, like cleaning the sensor lens, can prevent recurring issues and ensure reliable performance over time. Always test changes to confirm resolution.

Maintenance and Care
Regularly clean the sensor lens to maintain accuracy. Replace batteries as indicated by low-power alerts. Check for firmware updates to ensure optimal performance and security.
7.1 Cleaning the Motion Sensor for Optimal Performance
Use a soft, dry cloth to gently wipe the sensor lens, removing dust or debris. Avoid harsh chemicals or liquids, as they may damage the sensor. Regular cleaning ensures accurate motion detection and prevents false alarms; For stubborn smudges, lightly dampen the cloth with water, but ensure no moisture enters the device. Cleaning every 2-3 months is recommended to maintain reliability and performance.
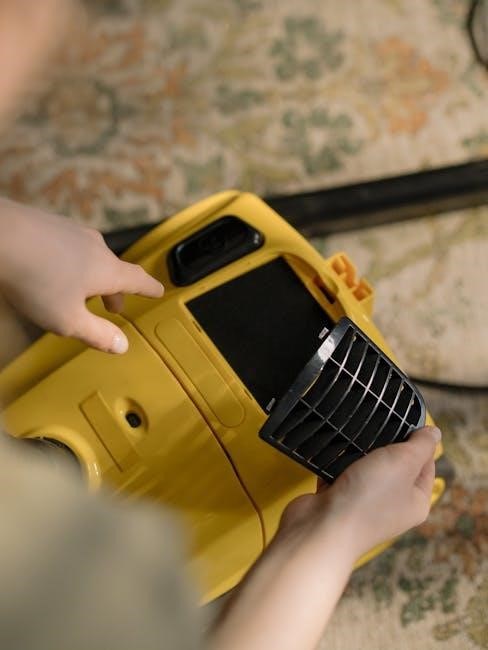
7.2 Replacing Batteries and Monitoring Battery Life
To maintain optimal performance, replace the batteries every 12-18 months or when the low-battery indicator flashes red. Use high-quality, alkaline batteries for reliability. Open the compartment gently, ensuring no damage to the contacts. Dispose of old batteries safely, following environmental guidelines. Monitor battery life through the alarm’s status lights or sounds. Regular checks prevent sudden power loss, ensuring continuous protection. Always test the alarm after replacing batteries to confirm proper function.

Integration with Security Systems
The Sabre Motion Sensor Alarm seamlessly integrates with home security networks, enhancing automation systems for comprehensive protection. Its compatibility ensures smooth operation with existing smart home setups.
8.1 Compatibility with Home Security Networks
The Sabre Motion Sensor Alarm is designed to integrate seamlessly with various home security systems, offering enhanced protection and compatibility with both wired and wireless networks. This ensures that users can easily incorporate the alarm into their existing security setup, improving overall safety and convenience. Its versatile design allows for smooth communication with other security devices, creating a unified and robust home protection network.
8.2 Enhancing Home Automation Systems
The Sabre Motion Sensor Alarm enhances home automation by triggering smart devices in response to motion detection. It can activate lights, security cameras, or alerts, creating a seamless and responsive environment. Integration with popular automation hubs allows for tailored settings, improving convenience and safety. This feature-rich system ensures that your home remains secure and efficient, adapting to your needs with cutting-edge technology and user-friendly controls.
Safety Precautions
Avoid touching sensors with wet hands to prevent malfunctions. Keep out of reach of children and pets to minimize false triggers and ensure safe operation always.
9.1 Avoiding False Alarms
False alarms can be minimized by adjusting sensitivity settings and positioning the sensor away from pets or drafts. Regular cleaning of the lens ensures accurate detection.
9.2 Safe Disposal of Batteries and Components
Dispose of batteries and components responsibly. Recycle them through approved programs to prevent environmental harm. Avoid mixing with household waste. Always follow local regulations for proper disposal methods.