Create adorable Lightning McQueen chocolate treats with ease! This guide provides step-by-step instructions for crafting chocolate eyes and mouth using molds‚ perfect for fans of all ages.
Overview of Lightning McQueen Chocolate Mold
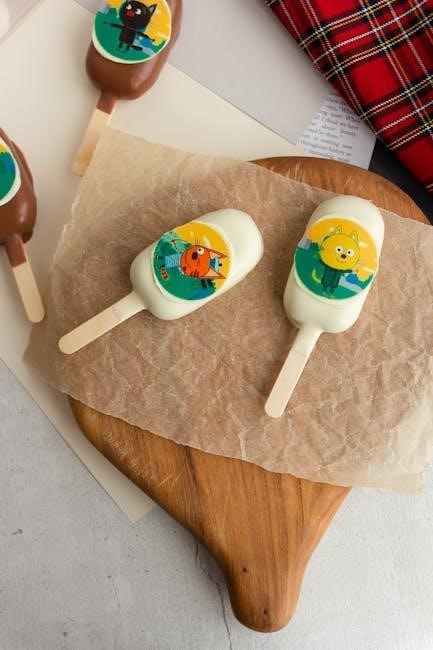
The Lightning McQueen Chocolate Mold is a fun and creative tool designed for fans of Disney Pixar’s Cars. Specifically crafted to produce chocolate treats shaped like Lightning McQueen’s iconic eyes and mouth‚ this mold is perfect for themed parties‚ gifts‚ or sweet surprises. Its detailed design ensures that each chocolate piece captures the character’s recognizable features. The mold is easy to use‚ making it accessible for both kids and adults. Whether you’re a DIY enthusiast or a parent looking for a fun activity‚ this mold offers a delightful way to bring Lightning McQueen to life in chocolate form. It’s a versatile and fun way to create edible treats that are sure to delight any Cars fan!
Materials Needed
To create Lightning McQueen chocolate eyes and mouth‚ you’ll need a chocolate mold kit‚ white chocolate‚ black candy melts‚ a microwave-safe bowl‚ a spoon‚ parchment paper‚ and a toothpick.
- Chocolate mold kit for Lightning McQueen eyes and mouth
- White chocolate or candy melts
- Black candy melts for details
- Microwave-safe bowl
- Spoon or spatula
- Parchment paper
- Toothpick for fine details
Chocolate Mold Kit for Lightning McQueen Eyes and Mouth
A high-quality chocolate mold kit is essential for creating precise Lightning McQueen eyes and mouth details. These molds are specifically designed to capture the iconic features of the character‚ ensuring your chocolates look authentic and recognizable; Made from durable‚ food-grade silicone or plastic‚ the molds are easy to use and clean‚ making them ideal for both beginners and experienced chocolate makers. The kit typically includes separate molds for the eyes and mouth‚ allowing you to craft each detail individually before assembling them. With their non-stick surfaces‚ the chocolates will release effortlessly once set‚ leaving you with professional-looking results. This kit is a must-have for fans of Lightning McQueen‚ offering a fun and creative way to bring the character to life in chocolate form. Perfect for themed parties‚ gifts‚ or treats‚ the molds ensure consistency and precision in every piece. Whether you’re using white chocolate‚ black candy melts‚ or colored cocoa butter‚ the molds will help you achieve the desired design with ease. Their compact size also makes them easy to store and reuse for future projects. By investing in a reliable chocolate mold kit‚ you can create stunning Lightning McQueen chocolates that impress and delight. Everything you need to bring the character’s face to life in chocolate is included in this convenient and versatile kit. With these molds‚ your creative possibilities are endless‚ allowing you to experiment with different colors and designs while maintaining the character’s signature look. The kit is a great addition to any chocolate-making collection‚ offering both functionality and fun. Its durability ensures it will remain a trusted tool for many projects to come. For anyone looking to create detailed chocolate pieces‚ this Lightning McQueen mold kit is a perfect choice. It simplifies the process‚ making it accessible to all skill levels while delivering professional-quality results. The molds are designed to inspire creativity and bring joy to both the maker and the recipient. With this kit‚ you can easily craft chocolates that resemble Lightning McQueen’s eyes and mouth‚ adding a personal and thoughtful touch to any celebration or gift. The molds are a fantastic way to combine your love for chocolate and the beloved Disney character‚ resulting in unique and memorable treats. Whether for a special occasion or just for fun‚ this kit is sure to bring a smile to everyone’s face. The molds are a testament to the magic of chocolate crafting‚ transforming simple ingredients into delightful‚ shareable art. They are a wonderful way to express your creativity and passion for both chocolate and the character. With this kit‚ the possibilities are endless‚ and the fun begins with every pour. The molds are a must-have for anyone eager to create Lightning McQueen chocolates with precision and ease. They simplify the process‚ ensuring that every piece turns out perfectly. This kit is a celebration of creativity‚ quality‚ and the joy of chocolate making. It’s the perfect tool for bringing Lightning McQueen to life in a delicious and charming way. The molds are designed to make the experience enjoyable and rewarding‚ allowing you to focus on the fun aspects of chocolate crafting. With this kit‚ you can create chocolates that are almost too cute to eat—almost. Whether you’re a seasoned pro or a curious beginner‚ the molds provide a user-friendly way to achieve stunning results. They are a great way to share your love for Lightning McQueen with friends and family through the art of chocolate. The molds are a delightful addition to any kitchen‚ offering endless opportunities for creativity and fun. With this kit‚ you can create chocolates that are as fun to make as they are to eat. The molds are a celebration of the character and the joy of chocolate making‚ bringing both together in perfect harmony. They are a thoughtful gift for fans and a wonderful tool for any chocolate enthusiast. The molds are a testament to the enduring appeal of Lightning McQueen and the magic of chocolate. With this kit‚ you can create chocolates that are as unique as they are delicious‚ making every piece a special treat. The molds are a great way to combine your passions and create something truly memorable. They are a must-have for anyone looking to add a personal touch to their chocolate creations. The molds are a celebration of creativity‚ quality‚ and the joy of bringing a beloved character to life in chocolate. With this kit‚ the possibilities are endless‚ and the fun begins with every pour. The molds are a wonderful way to express your creativity and passion for both chocolate and Lightning McQueen. They are a must-have for any chocolate maker looking to create detailed‚ professional-quality pieces with ease. The molds are a testament to the magic of chocolate crafting‚ transforming simple ingredients into delightful‚ shareable art. They are a great way to bring joy and excitement to any celebration or gathering. With this kit‚ you can create chocolates that are as fun to make as they are to eat‚ making it a perfect addition to any kitchen. The molds are a celebration of creativity‚ quality‚ and the joy of chocolate making‚ bringing both together in perfect harmony. They are a must-have for anyone looking to create Lightning McQueen chocolates with precision and ease. The molds are a fantastic way to combine your love for chocolate and the beloved Disney character‚ resulting in unique and memorable treats. Whether for a special occasion or just for fun‚ this kit is sure to bring a smile to everyone’s face. The molds are a testament to the magic of chocolate crafting‚ transforming simple ingredients into delightful‚ shareable art. They are a wonderful way to express your creativity and passion for both chocolate and the character. With this kit‚ the possibilities are endless‚ and the fun begins with every pour. The molds are a must-have for anyone eager to create Lightning McQueen chocolates with precision and ease. They simplify the process‚ ensuring that every piece turns out perfectly. This kit is a celebration of creativity‚ quality‚ and the joy of chocolate making. It’s the perfect tool for bringing Lightning McQueen to life in a delicious and charming way. The molds are designed to make the experience enjoyable and rewarding‚ allowing you to focus on the fun aspects of chocolate crafting. With this kit‚ you can create chocolates that are almost too cute to eat—almost. Whether you’re a seasoned pro or a curious beginner‚ the molds provide a user-friendly way to achieve stunning results. They are a great way to share your love for Lightning McQueen with friends and family through the art of chocolate. The molds are a delightful addition to any kitchen‚ offering endless opportunities for creativity and fun. With this kit‚ you can create chocolates that are as fun to make as they are to eat. The molds are a celebration of the character and the joy of chocolate making‚ bringing both together in perfect harmony. They are a thoughtful gift for fans and a wonderful tool for any chocolate enthusiast. The molds are a testament to the enduring appeal of Lightning McQueen and the magic of chocolate. With this kit‚ you can create chocolates that are as unique as they are delicious‚ making every piece a special treat. The molds are a great way to combine your passions and create something truly memorable. They are a must-have for anyone looking to add a personal touch to their chocolate creations. The molds are a celebration of creativity‚ quality‚ and the joy of bringing a beloved character to life in chocolate. With this kit‚ the possibilities are endless‚ and the fun begins with every pour. The molds are a wonderful way to express your creativity and passion for both chocolate and Lightning McQueen. They are a must-have for any chocolate maker looking to create detailed‚ professional-quality pieces with ease. The molds are a testament to the magic of chocolate crafting‚ transforming simple ingredients into delightful‚ shareable art. They are a great way to bring joy and excitement to any celebration or gathering. With this kit‚ you can create chocolates that are as fun to make as they are to eat‚ making it a perfect addition to any kitchen. The molds are a celebration of creativity‚ quality‚ and the joy of chocolate making‚ bringing both together in perfect harmony. They are a must-have for anyone looking to create Lightning McQueen chocolates with precision and ease. The molds are a fantastic way to
Ingredients and Tools Required
To create Lightning McQueen chocolates‚ you’ll need white chocolate or candy melts for the base‚ black candy melts for details‚ and colored cocoa butter for custom designs. Tools include a double boiler or microwave-safe bowl for melting‚ a spatula for pouring‚ and a freezer for setting. The Lightning McQueen mold is essential for shaping the chocolates. Optional items like edible markers or food-grade paint can add finer details. Ensure all tools are clean and dry before use to prevent chocolate from seizing. For safety‚ handle hot chocolate carefully and keep molds away from children. Using high-quality ingredients ensures smooth melting and professional results. Gather all materials beforehand to streamline the process and achieve the best outcome. Proper preparation is key to creating detailed and visually appealing Lightning McQueen chocolates. With these ingredients and tools‚ you’re ready to bring the character to life in chocolate form.
Step-by-Step Instructions
Follow our detailed guide to craft Lightning McQueen chocolates. From melting to molding‚ each step ensures perfect results and brings the character to life easily.
Gathering Materials and Preparing the Mold
Start by collecting all necessary materials‚ including the Lightning McQueen chocolate mold‚ high-quality chocolate‚ a double boiler or microwave-safe bowl‚ and optional molds for details like eyes and a mouth. Ensure the mold is clean and dry before use. If using a silicone mold‚ lightly spray it with cooking spray to prevent sticking. Place the mold on a flat‚ stable surface. Melt the chocolate according to the instructions‚ either in a double boiler or in short bursts in the microwave‚ stirring between each interval until smooth and fully melted. Once ready‚ pour the melted chocolate into the prepared mold‚ filling each cavity evenly. Tap the mold gently to remove any air bubbles‚ ensuring a smooth finish. Allow the chocolate to set at room temperature or in the refrigerator for about 10-15 minutes‚ depending on the size of the mold. Once set‚ carefully remove the chocolate pieces from the mold. For details like eyes and mouth‚ use a small paintbrush or a toothpick to apply melted white or black chocolate‚ creating the desired features. Let these details set before handling the chocolates further. Proper preparation ensures professional-looking results and makes the process enjoyable and stress-free.
Melting Chocolate and Pouring into the Mold
Begin by selecting high-quality chocolate for the best flavor and texture. Melt the chocolate using a double boiler or microwave-safe bowl in short intervals‚ stirring between each heating to avoid burning. Once fully melted‚ remove from heat and allow it to cool slightly. Pour the melted chocolate into the Lightning McQueen mold‚ ensuring each cavity is filled evenly. Use a spatula to spread the chocolate smoothly and remove any excess. Gently tap the mold to eliminate air bubbles‚ ensuring a flawless finish. For intricate details like eyes and mouth‚ reserve a small amount of melted chocolate for later use. Allow the chocolate to set at room temperature or chill in the refrigerator for 10-15 minutes to harden completely before proceeding.
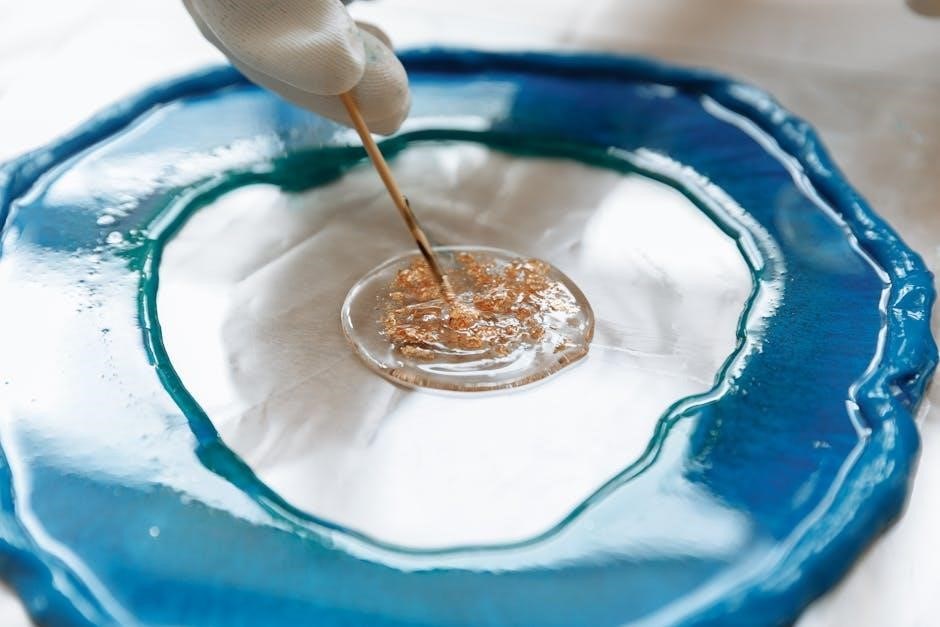
Creating the Eyes and Mouth Details
Gather the materials needed for the details‚ such as white and black chocolate or edible markers. For the eyes‚ melt a small amount of white chocolate and pour it into a separate mold or shape it into circles. Allow it to harden slightly before placing it into the Lightning McQueen mold. Use a toothpick or small tool to create the pupils with melted black chocolate. For the mouth‚ melt a thin layer of black chocolate and spread it into a curved line‚ matching Lightning McQueen’s iconic smile. Alternatively‚ use edible markers to draw the mouth directly onto the chocolate once set. Ensure all details are securely attached by gently pressing them into place or using a dab of melted chocolate as adhesive. Press lightly to avoid breaking the chocolate base.
Allowing the Chocolate to Set
Once the chocolate is poured into the Lightning McQueen mold‚ it’s crucial to allow it to set properly. Place the mold on a flat surface and let it cool at room temperature for about 10-15 minutes. For faster setting‚ refrigerate the mold for 5-7 minutes. Avoid overheating or overcooling‚ as this can cause the chocolate to stick or become brittle. Gently tap the mold to remove air bubbles. Once set‚ carefully remove the chocolate from the mold‚ starting from the edges. For best results‚ use high-quality chocolate. Keep the mold clean and dry‚ and store the set chocolates in an airtight container to maintain freshness. Avoid handling the chocolates excessively to prevent melting or smudging.
Safety Tips and Precautions
Handle hot chocolate and molds with care to avoid burns. Use protective gloves and keep out of children’s reach. Ensure the workspace is clean and stable.
Handling Hot Chocolate and Molds Safely
When working with hot chocolate and molds‚ safety is paramount. Always use protective gloves to prevent burns from hot chocolate or molds. Ensure the workspace is stable and clean to avoid accidents. Keep children away from hot equipment and sharp objects. Use a double boiler or microwave-safe bowl to melt chocolate‚ stirring occasionally to prevent overheating. Never leave melting chocolate unattended. Allow molds to cool slightly before handling to avoid burns. Store molds in a dry place to prevent damage. By following these precautions‚ you can enjoy a safe and enjoyable experience creating Lightning McQueen chocolate treats. Safety first ensures fun for everyone!