A Volvo Penta Service Manual is a comprehensive guide for maintaining and repairing your engine. It covers parts diagrams, troubleshooting, and essential maintenance procedures. Use it to ensure optimal performance and longevity.
1.1 What is a Volvo Penta Service Manual?
A Volvo Penta Service Manual is a detailed guide designed to help users maintain, repair, and troubleshoot their marine engines effectively. It provides essential information on parts diagrams, maintenance schedules, and repair procedures. The manual is tailored to specific engine models, ensuring accuracy and relevance. Whether you’re a professional mechanic or a boat owner, it offers clear instructions for routine servicing and complex repairs. Safety guidelines are also included to prevent accidents during maintenance. By following the manual, users can ensure their engine operates at peak performance and longevity.
Additionally, the manual covers troubleshooting common issues and provides diagnostic techniques. It emphasizes the importance of using authorized Volvo Penta workshops for critical repairs, such as ignition and fuel injection systems. This ensures compliance with manufacturer standards and guarantees optimal results. Regularly referencing the manual helps prevent oversights in maintenance, reducing the risk of engine damage and extending its lifespan. Overall, it is an indispensable resource for anyone working with Volvo Penta engines.
1.2 Importance of Using the Correct Service Manual
Using the correct Volvo Penta Service Manual is crucial for ensuring the longevity and optimal performance of your engine. It provides model-specific instructions, guaranteeing accuracy and safety during maintenance and repairs. Incorrect manuals may lead to improper procedures, potentially causing engine damage or safety hazards. The manual includes essential safety guidelines, troubleshooting techniques, and maintenance schedules, all tailored to your engine type. By following the correct manual, you avoid costly mistakes and ensure compliance with manufacturer standards. This is especially vital for complex systems like ignition and fuel injection, which require precise attention. Proper adherence to the manual also reduces the risk of accidents and extends the engine’s lifespan.
Failing to use the correct manual can result in oversights, leading to premature wear or even engine failure. Always consult the official Volvo Penta Service Manual for your specific model to ensure reliability and safety.
1.3 How to Identify the Right Manual for Your Engine
To identify the correct Volvo Penta Service Manual for your engine, start by locating the engine model and serial number, typically found on the engine block or in the operator’s manual. Cross-reference these details with Volvo Penta’s official website or authorized workshops to ensure accuracy. The manual should match your engine’s specific type and year, as procedures vary between models. Additionally, Volvo Penta provides online resources and support to help users find the appropriate manual. Always verify the manual’s compatibility with your engine to avoid mismatches. Using the correct manual ensures adherence to manufacturer guidelines, promoting safety, efficiency, and accurate repairs. This step is crucial for maintaining your engine’s performance and longevity.

Key Features of the Volvo Penta TMD40A Engine
The Volvo Penta TMD40A engine is known for its durability, fuel efficiency, and ease of maintenance. It features a robust 4-cylinder design, offering reliable performance for marine applications.
2.1 Overview of the TMD40A Engine
The Volvo Penta TMD40A is a high-performance marine diesel engine designed for durability and efficiency. It features a 4-cylinder configuration, providing smooth operation and reduced vibration. Known for its fuel efficiency, the TMD40A is a preferred choice for marine operators seeking reliable power. The engine is compact, making it ideal for various vessel applications. Its design emphasizes ease of maintenance, with accessible components and clear service guidelines outlined in the Volvo Penta service manual. Operators can expect consistent performance, reduced emissions, and long service life with proper care. The TMD40A balances power and efficiency, making it suitable for both commercial and recreational marine use.
2.2 Key Features and Benefits
The Volvo Penta TMD40A engine offers exceptional performance and reliability, making it a top choice for marine applications. Its 4-cylinder design ensures smooth operation and reduced vibration, enhancing overall comfort. The engine is fuel-efficient, lowering operational costs while maintaining high power output. Easy maintenance is a key feature, with accessible components and detailed service guidelines in the Volvo Penta manual. The TMD40A also boasts durable construction, designed to withstand harsh marine environments. Additionally, it features low emissions, aligning with environmental standards. These benefits combine to provide long service life, reduced downtime, and consistent performance, making the TMD40A an excellent investment for marine operators seeking a dependable and efficient power solution.

Safety Information and Precautions
Always wear protective gear and ensure proper ventilation when working with engines. Follow safety protocols to prevent accidents and ensure compliance with safety standards.
3.1 General Safety Guidelines
Always wear protective clothing, including gloves, safety glasses, and a face mask when servicing your Volvo Penta engine. Ensure the workspace is well-ventilated to avoid inhaling harmful fumes. Disconnect the battery before starting any maintenance to prevent accidental startups. Use approved tools and follow the manufacturer’s instructions to avoid damage or injury. Keep flammable materials away from the work area and ensure proper lighting for clear visibility. Never work on a hot engine; allow it to cool down first. Familiarize yourself with emergency procedures, such as a fire extinguisher, in case of unexpected situations. Adhere to all safety warnings and cautions provided in the Volvo Penta service manual to ensure a safe working environment.
3;2 Handling Chemicals and Coolants Safely
When handling chemicals and coolants, always wear protective gloves and goggles to prevent skin and eye irritation. Ensure the work area is well-ventilated to avoid inhaling harmful fumes. Avoid direct contact with coolants, as they may contain toxic substances. Use approved containers for storing and disposing of chemicals. Refer to the Volvo Penta service manual for specific guidelines on handling and disposing of coolant and other hazardous materials. Never mix different types of coolants, as this can cause chemical reactions. Clean up spills immediately to prevent accidents. Dispose of used chemicals and coolants responsibly, adhering to local environmental regulations. Always follow the manufacturer’s instructions for safe handling and storage.
3.3 Emergency Procedures
In case of an emergency, such as a fire or coolant leakage, act quickly and follow proper procedures. Turn off the engine immediately and disconnect the battery to prevent further damage. Evacuate the area and ensure proper ventilation to avoid inhaling harmful fumes. Use a fire extinguisher rated for engine fires if necessary. For coolant spills, contain the area to prevent environmental contamination. Refer to the Volvo Penta service manual for specific emergency protocols. Keep emergency contact numbers handy, such as the nearest Volvo Penta workshop. Never attempt to restart the engine until it has been inspected by a professional. Always prioritize safety to minimize risks and ensure effective resolution.
Maintenance Tips for Volvo Penta Engines
Regular maintenance is essential for Volvo Penta engines. Follow the service manual for routine checks, fluid changes, and inspections. Professional servicing ensures optimal performance and longevity.
4.1 Routine Servicing Requirements
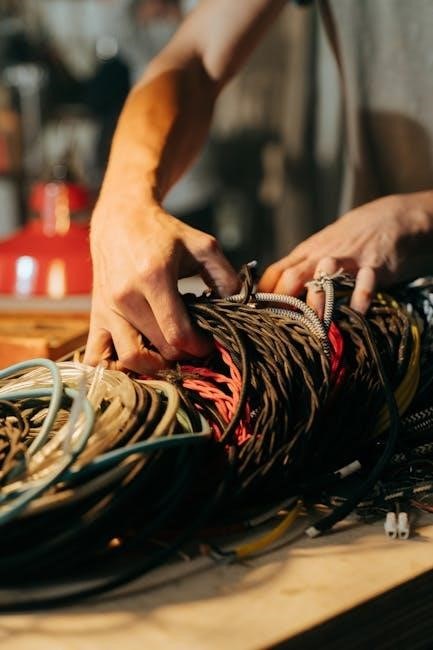
Volvo Penta engines require consistent upkeep to ensure reliability and performance. Routine servicing includes oil and filter changes, coolant inspections, and belt replacements, as outlined in the service manual. Regularly check fuel injection systems for cleanliness and proper function. Inspect hoses and connections for signs of wear or leaks. Electrical systems, including battery terminals and wiring, should be tested for corrosion or damage. Follow the recommended service intervals to prevent premature wear and maintain engine efficiency. Proper documentation of servicing helps track maintenance history and ensures compliance with manufacturer guidelines. Always refer to the Volvo Penta service manual for specific procedures and intervals tailored to your engine model.
4.2 Ignition and Fuel Injection System Maintenance
Regular maintenance of the ignition and fuel injection systems is crucial for optimal engine performance. Spark plugs should be inspected and replaced at intervals specified in the Volvo Penta service manual to ensure proper ignition. The air filter must be cleaned or replaced to maintain airflow efficiency. For the fuel injection system, inspect for leaks, cracks, or blockages and clean or replace components as needed. Fuel injectors should be serviced periodically to prevent clogging, which can reduce fuel efficiency. Always use genuine Volvo Penta parts and follow the manual’s guidelines to avoid damage or decreased performance. Proper maintenance ensures reliable engine operation, reduces emissions, and prevents costly repairs. Adhere to the recommended schedules to keep your engine running smoothly.
4.3 Coolant System Maintenance
Regular coolant system maintenance is essential to prevent overheating and ensure optimal engine performance. Always use a 50/50 mixture of genuine Volvo Penta antifreeze and distilled water to maintain corrosion protection and proper cooling. Inspect the coolant level regularly and top it up as needed, avoiding overfilling. Check hoses, radiators, and connections for leaks, cracks, or damage, and replace them immediately if issues are found. The coolant should be replaced every 2-3 years or as specified in the service manual. Use a pressure test to identify any leaks in the cooling system. Monitor the temperature gauge during operation and address any unusual readings promptly. Proper maintenance prevents engine damage, reduces wear, and ensures reliable operation in all conditions.

Troubleshooting Common Issues
Troubleshooting common issues in Volvo Penta engines involves identifying symptoms, diagnosing root causes, and applying solutions. Use diagnostic tools and the service manual for accurate repairs.
5.1 Identifying Common Problems
Identifying common problems in Volvo Penta engines often starts with recognizing abnormal symptoms such as unusual noises, reduced performance, or warning lights. The service manual provides detailed troubleshooting guides to help pinpoint issues. Common problems include overheating, low power output, or rough engine operation. By referencing the manual, users can match symptoms to specific fault codes or components. For example, coolant leaks or faulty sensors may cause temperature fluctuations, while fuel system clogs can lead to poor performance. Regular inspection of filters, belts, and fluid levels can prevent many issues. The manual also offers diagnostic steps, ensuring accurate identification and repair of problems, minimizing downtime and maintaining engine efficiency. Always consult the manual for precise troubleshooting procedures.
5.2 Diagnostic Techniques
Volvo Penta service manuals outline advanced diagnostic techniques to efficiently identify and resolve engine issues. These methods include systematic troubleshooting, visual inspections, and the use of specialized tools. The manual emphasizes the importance of checking error codes via the Electronic Control Unit (ECU) for precise fault identification. Diagnostic tools like Volvo Penta’s proprietary software or generic OBD-II scanners can retrieve detailed information. Additionally, manual inspections, such as compression tests or fuel system checks, are recommended to isolate problems. By following the structured diagnostic process outlined in the manual, users can quickly pinpoint the root cause of malfunctions, ensuring timely and effective repairs. This systematic approach minimizes guesswork and reduces the risk of further damage to the engine. Always refer to the manual for specific diagnostic procedures tailored to your engine model.

Finding the Right Volvo Penta Service Manual
Diagnostic techniques in Volvo Penta service manuals involve systematic troubleshooting, error code analysis, and functional tests. Manuals guide users through ECU error code interpretation, sensor checks, and mechanical inspections. Tools like compression testers and fuel pressure gauges help identify issues. Step-by-step procedures ensure accurate diagnoses, reducing repair times and costs. Always follow manual recommendations for precise troubleshooting.
6.1 Types of Manuals Available
Volvo Penta service manuals are available in various formats to cater to different needs. The repair manual provides detailed instructions for engine overhaul and complex repairs, while the parts manual includes diagrams and lists of components for accurate ordering. The operation and maintenance manual focuses on routine care and user guidelines. Additionally, wiring diagrams are offered for electrical system troubleshooting. These manuals are available as downloadable PDFs from Volvo Penta’s official website or authorized dealers. Ensure to select the manual that matches your engine model for accurate information. Always verify the source to avoid counterfeit or outdated versions.
6.2 How to Access the Manual Online
Accessing a Volvo Penta service manual online is straightforward. Visit the official Volvo Penta website and navigate to the “Service & Support” or “Downloads” section. Enter your engine model or serial number to find the corresponding manual. Authorized Volvo Penta dealers also provide access to these manuals, often through their websites or upon request. Additionally, some platforms offer downloadable PDF versions, ensuring convenience for users. Always verify the source to ensure authenticity and avoid counterfeit documents. For optimal results, use the latest version of your web browser and ensure your device meets the necessary requirements for downloading large PDF files.

Volvo Penta Parts Diagrams
Volvo Penta parts diagrams provide detailed visual representations of engine components, aiding in identification and location for maintenance and repairs, essential for service manual users.
7.1 Understanding Parts Diagrams
Volvo Penta parts diagrams are detailed visual tools that illustrate the components of your engine, helping you identify and locate parts accurately. These diagrams are essential for understanding how different parts connect and function within the system. They provide a clear and precise overview, making it easier to perform maintenance, repairs, or upgrades; By referring to these diagrams, you can ensure that you are using the correct parts for your specific engine model, reducing the risk of compatibility issues. The diagrams are often color-coded or labeled to enhance clarity, making them accessible even to those with limited technical expertise. Regularly consulting the parts diagrams can help you avoid mistakes and ensure your engine operates at peak performance. They are a valuable resource for both DIY enthusiasts and professional mechanics.

DIY Service vs. Professional Service
DIY service offers cost savings and convenience but requires technical expertise, while professional service provides reliability and warranty benefits, ideal for complex repairs and maintenance.
8.1 When to Perform DIY Repairs
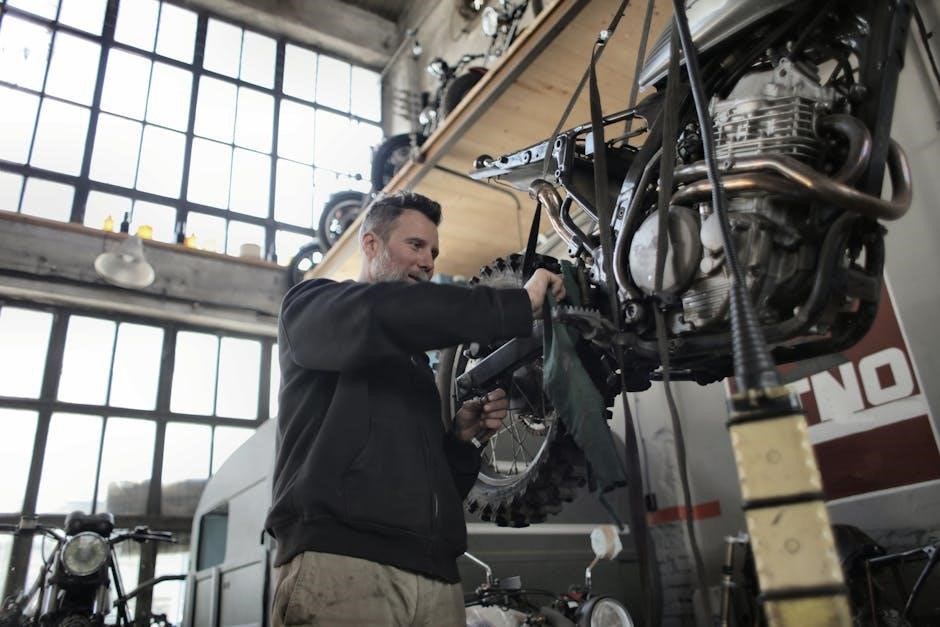
DIY repairs are ideal for minor maintenance tasks, such as oil changes, filter replacements, or basic inspections, where the process is straightforward and well-documented in the Volvo Penta service manual. Individuals with mechanical aptitude and access to tools can save costs and gain hands-on experience. However, DIY should only be attempted when the user is confident in their abilities and has thoroughly reviewed the manual. Complex repairs, such as engine overhauls or fuel injection system adjustments, may require specialized tools and expertise, making professional service the safer choice. Always prioritize safety and ensure compliance with manufacturer guidelines to avoid voiding warranties or causing further damage to the engine.
8.2 Benefits of Authorized Workshops
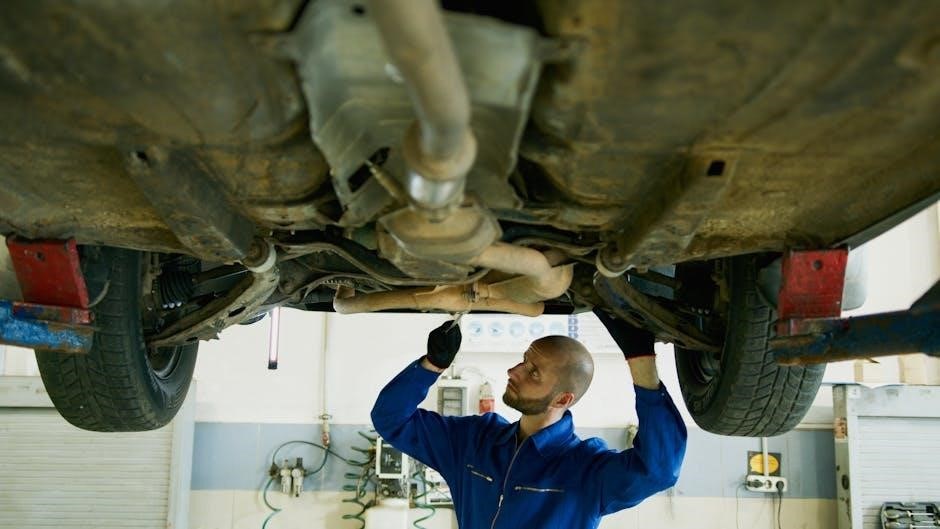
Authorized Volvo Penta workshops offer unparalleled expertise and reliability, ensuring your engine is serviced to the highest standards. Technicians are factory-trained, possess in-depth knowledge of Volvo Penta systems, and use genuine parts, guaranteeing optimal performance and longevity. These workshops are equipped with specialized tools and diagnostic equipment, enabling precise and efficient repairs. Additionally, they provide warranty compliance, protecting your investment and ensuring legal requirements are met. By choosing an authorized workshop, you benefit from access to the latest technical updates, enhanced safety, and reduced risk of future issues. This level of professionalism and quality assurance is particularly critical for complex or high-stakes repairs, offering peace of mind and maintaining your engine’s peak condition.
Common Mistakes to Avoid
Ignoring routine maintenance, using incorrect parts, and skipping safety guidelines are common mistakes that can lead to engine damage and compromised performance. Always adhere to the manual’s instructions to prevent such issues and ensure longevity.
9.1 Oversights in Maintenance
One of the most common oversights in maintenance is neglecting to check and maintain coolant levels, which can lead to overheating and engine damage. Another mistake is ignoring the recommended oil change intervals, resulting in poor engine lubrication and increased wear. Additionally, failing to inspect and replace worn-out belts and hoses can cause unexpected breakdowns. Improper tightening of bolts and connections, such as head bolts or manifold clamps, can also lead to leaks and reduced performance. Lastly, many users overlook the importance of cleaning or replacing fuel filters, which can cause fuel system inefficiencies and engine stalling. Always consult the Volvo Penta service manual for specific maintenance schedules and guidelines to avoid these costly mistakes.

Best Practices for Engine Longevity
Common maintenance oversights include neglecting oil changes, ignoring coolant levels, and skipping filter replacements, all of which can lead to premature engine wear and costly repairs.
10.1 Regular Maintenance Habits
Regular maintenance habits are the foundation of ensuring the longevity and optimal performance of your Volvo Penta engine. Start by consistently checking and maintaining proper oil levels, coolant levels, and fuel filter condition as outlined in the Volvo Penta service manual. Regularly inspecting and replacing air filters and drive belts according to the recommended schedule can prevent unexpected breakdowns. Adhering to the service intervals specified by Volvo Penta ensures that your engine receives the necessary care to run efficiently. Additionally, using genuine Volvo Penta parts guarantees compatibility and durability. Developing a consistent maintenance routine helps in identifying potential issues early, thereby extending the engine’s lifespan and maintaining its performance over time.